Extra Discount for $150+ Orders

Create a DIY Easter Basket with the EZSound Box
Posted on
Easter is one of the biggest holidays of the year, and for many people it’s the perfect opportunity to give colorful gifts and goodies to their loved ones. Stores are always stocked full of Easter themed baskets, candy, and other treats, making it easy to get prepackaged presents. The only problem with these premade gifts is that they lack a personal touch and don’t always allow you to customize them.
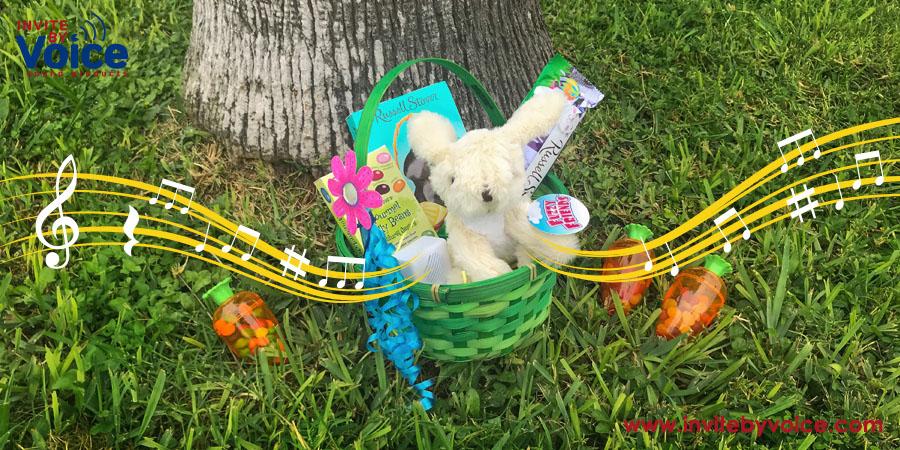
If you’re like me, you want your family and friends to have personalized gifts that make the holiday special. That’s why I decided to make a unique Easter basket this year. Using the EZSound Box with a 10 Inch Extension Play Button from Invite By Voice, I created a distinctive and delightful basket with a playful spring melody.
In this blog, I will walk you through the fun and easy process of putting together a DIY Easter Basket with the EZSound Box. See for yourself how easy it is to create your own personalized Easter basket filled with fun, treats, and the gift of custom sound.

Step 1: Choose and Record Your Message/Song
Your first step is to choose what message or song to pair with your Easter basket, and then load your selection onto your EZSound Box. Before starting the recording process, make sure to read the instructions carefully and gather the necessary materials – besides your sound box, the only things you’ll need to have on hand for this step are batteries, a screwdriver, and whatever device you’re recording from.
I recorded a brief clip from “Here Comes Peter Cottontail” from the YouTube app on my tablet. Your recording can be up to 120 seconds long, and you can choose whatever kind of audio that will make your gift basket come to life. It can be an Easter melody, a poem, or a voice message (if you need some song ideas, take a look at this list of Easter songs from Hillsong). After you’ve loaded your recording onto the EZSound Box, make sure to test the sound to see if the device is working.

Step 2: Prepare Your Materials and Set Up Your Basket
It’s time to prepare your Easter basket and set out the supplies you will need to customize it. You can use any kind of basket you’d like as long as it’s large enough for the recordable musical insert to fit comfortably inside it. When choosing your other supplies, decide on what kind of style or design you’d like to create - your gift basket can be as simple or as elaborate as you’d like. I picked out an inexpensive green wicker basket from my local store and filled it with some yellow paper grass, and then went through my craft supplies to pick out my necessary tools and materials.
Step 3: Decorate Your Basket
Using the materials that you’ve prepared, decorate your Easter basket. The great part about this step is you can really tap into your creativity and make any style of basket that your loved one will like. It can fun and playful, subtle and sophisticated, or anywhere in between. And remember that Easter baskets don’t have to be just for kids: adults can join in on the fun too! There aren’t any young children in my family right now, but I know that my grown siblings and cousins will love to receive personalized gift baskets with sound. I decided to keep my decorations fairly simple. The main embellishments are some curly ribbon and a bright flower to draw attention to the 10-inch extension play button.

Step 4: Attach the EZSound Box to Your Basket and Test the Audio
Now it’s time to attach the EZSound Box to your Easter basket. You can place the sound box anywhere on or in your basket, as long as the extension play button is visible and easily accessible. I chose to nestle the sound box along the inside edge of the basket and tape the play button onto the handle, wrapping the excess cable loosely around the handle. I then placed the flower over the play button to make it stand out. As soon as the button was securely attached, I clicked on it to make sure the sound worked as it should. I felt very rewarded to hear my Easter song playing back to me!

Step 5: Fill Your Easter Basket
Your final step in this process is to fill your custom Easter basket with the toys or treats that would please your loved one. Sweets are a common basket filler, but if you need some ideas for non-candy items, check out this helpful list from Good Housekeeping. To complete my Easter basket, I popped in some blowing bubbles, a stuffed bunny, and several varieties of candy. I love how the colors and textures of the decorated basket combine with the recorded music from the sound box to create a vibrant musical gift!
Following the steps above will result in a wonderful custom creation that will capture the joy and excitement of the season. The EZSound Box provides an added touch of fun and delivers a personalized holiday experience that young and old alike can enjoy. You can feel confident that this DIY Easter basket is a totally unique present that will surprise and delight its recipient.
You wanna share this blog post in your social accounts? Please use the social icons at the bottom of this article, or the ones at the very bottom of this page. We are so grateful for your sharing
Quick links
Contact
Invite By Voice LLC
9935-D Rea Rd, Suite 230
Charlotte, NC 28277
info@invitebyvoice.com
About us
Since 2009, it has been our firm commitment to offer the highest quality sound products, and also provide excellent service for our customers.


Leave a comment: