Extra Discount for $150+ Orders

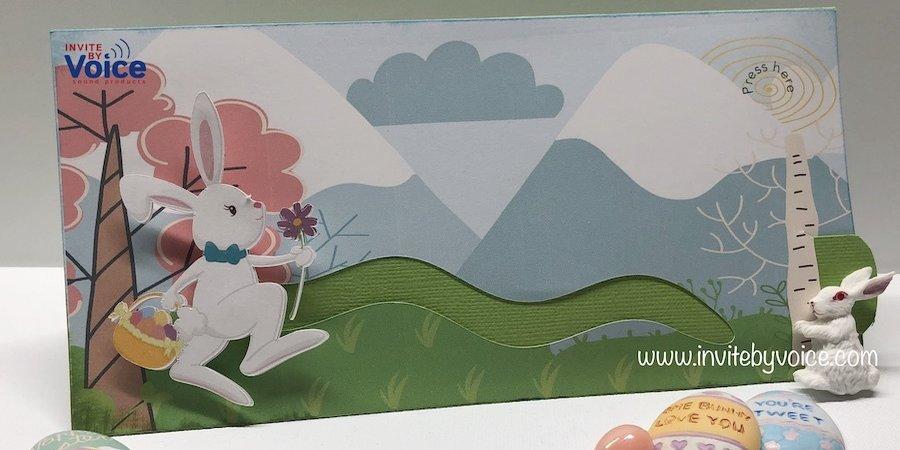
Easter Bunny Hop Card with "The Hipwaders" Song
Posted on
Easter is just around the corner and what better way to celebrate with the kids and grands than with an interactive card that moves and has sound!

You’ll need:
12 x 12 AC Cardstock (Grass)
2 – 8.5 x 11 white cardstock (to print background scenes and bunny)
Penny
Foam tape or dots
Score-Tape
Craft knife
Paper trimmer
score board and bone folder
EZSound Module – Push Button Activated
Digital images: : Mega Easter Bundle (Bunny with Flower and Basket) & Easter is Here (Spring-scenes-11)
Printer
Electronic Die Cutting Machine (optional)

Let’s get started:
• You’ll need to resize and print 2 card fronts (8.5 x 4.25). 1 scene will not have the cut for the slider. I used import and the print to cut feature in my die cutting machine software for the background and created the slot for the slider using a cylinder from basic shapes and added a wave effect. I also added a Press Here using text on path in the upper right corner where the button for the sound module would be. Make sure that any text you put on the scene is set to print2cut print. Import the bunny into the software and size appropriately to fit into the scene. Check preview and then cut with the software using the white cardstock. Set aside.
• The card base and pull tab are cut from the 12 x 12 cardstock. The card base is cut to 8.5 x 12 inches. Score at 3 7/8 and 8 1/8 along the long side. Crease well with the bone folder.
• The pull tab is a piece cut at 2 ¼ x 9 inches. Score at 1 1/8 the length of the piece. Crease well. Apply glue to the inside of this piece. Fold along the score line and press. Let dry. Trim one end if desired. You want the tab to cover the entire length of the slider slot.

• Create a slot to slide the pull tab through.
• Attach the card front that doesn’t have the slider slot to the card base in the middle section of the card base. Apply tape to the edges of this piece, making sure that the tape won’t interfere with the tab as it is pulled.

• Attach the card front with slider. The pull tab should be in place and move freely when used.
• Following the Invite By Voice instructions, record the EZSound module. Mark placement for the button on the module on the inside of the card
front. Turn the module over with the backing side up. The button should be against the card. Remove the release paper backing and fold the cover for the card front and secure the module to the flap.


• Apply foam tape along the edges, remove the release paper. Secure the flap to the back of the card front.

• Turn the piece over and place a foam dot or trimmed piece of foam tape to the left front of the slider/tab. Remove the release paper and attach a penny


• Secure the bunny to the penny.
• Press the play button on the module and pull the tab and make the bunny “hop” across the front of the card.
Here is how the finished card looks like

Please watch the video below to see how this project turned out to be an amazing card. Be sure to check out our website and blog posts to see how to incorporate our other products into fantastic custom gifts to give to friends, family, and anyone at all!
You wanna share this blog post in your social accounts? Please use the social icons at the bottom of this article, or the ones at the very bottom of this page. We are so grateful for your sharing
Quick links
Contact
Invite By Voice LLC
9935-D Rea Rd, Suite 230
Charlotte, NC 28277
info@invitebyvoice.com
About us
Since 2009, it has been our firm commitment to offer the highest quality sound products, and also provide excellent service for our customers.

Leave a comment: