Extra Discount for $150+ Orders

Create Your Own Talking Mother’s Day Card
Posted on
Impress your mom with a DIY Audio Card this Mother’s Day.
May is a wonderful time of year when we celebrate our mothers, grandmothers, aunts, and other maternal figures who give us joy. It’s also an incredibly busy month and I, like many others, sometimes have trouble planning for Mother’s Day and finding the right gifts for the significant women in my life. Fortunately, this year’s gift search is going to be easier than ever, because the high-quality sound products from Invite By Voice have me covered.
This Mother’s Day, I’m taking a creative approach and making personalized audio presents for my favorite moms. I’ve started this process by creating a musical gift box for my mom that plays a song she loves. But there’s another lady I want to make something special for: my mother-in-law! My husband often forgets that Mother’s Day is coming up before it’s too late, and then we get stuck rushing to the store for a last-minute gift. This year, I am taking the reins and using an EZSound Module for DIY Audio Cards to make his mom a talking sound card that will greet her with an affectionate message from both of us.
You may think that fashioning a DIY audio card would be a challenging process, but it’s actually very quick and easy. The photos and directions in this blog will illustrate how to make your own talking greeting card. Read through the steps below to find out how this unique gift can be made.

Step 1: Select and Record Your Message
This first step is the most important: figure out what your audio card is going to say. I kept my message short and sweet, with brief but loving Mother’s Day greetings from both me and my husband. I made this voice recording using an app on my cell phone (all cell/smart phones are equipped with factory installed voice recorder apps. You do NOT need to make any purchase), and then loaded it onto the EZSound Module straight from the phone. When your message is ready to be put on the sound module, follow the recording instructions carefully. Video showing how to transfer voice recordings from your device to voice chip is given here. Make sure to test whatever audio you load onto the module before you attach it to your card.

Step 2: Gather the Materials for Your Card
Now that your message has been recorded, it’s time to prepare the tools and supplies you’ll need to make your card. The most basic material you’ll require is paper – I grabbed a few sheets of plain white paper along with some heavier craft paper. I also set out some supplies needed to decorate my card, including writing utensils, colored markers, scissors, tape, and glue.
Step 3: Construct Your Card
It’s up to you how to assemble your card, as long as it’s durable and large enough to fit the EZSound Module inside of it. I folded an 8.5 by 11 inch piece of white paper in half and glued some thicker pink paper on the outside to reinforce it (a heavier cardstock helps to carry the weight of the sound module). When all of the glue was dry, I made sure the card would fold with no problems.

Step 4: Decorate Your Card
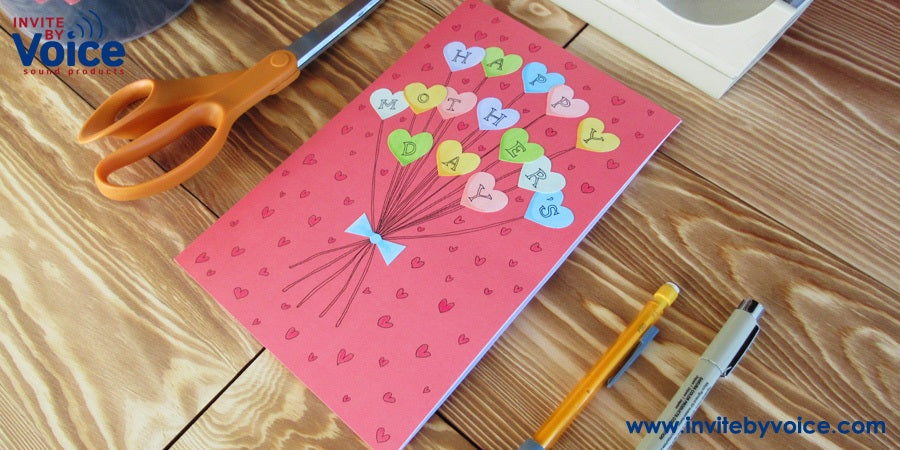
Your card can be decorated however you want! You can produce an elaborate design or illustration if you want it to be visually impressive. If you’re not artistically inclined, a simple photo of you and your mom can be just as meaningful. For my design, I used some pieces of colored paper to create a bouquet of heart-shaped balloons, and then drew some smaller hearts surrounding the balloons. I echoed this motif on the inside with some additional cut out hearts.
Step 5: Attach the EZSound Module to Your Card
When your card is decorated, peel the self-adhesive backing off of the EZSound Module and then stick it to the inside of the card. It’s important that you align the notch in the module with the fold of your card – this will allow the slide tongue to move whenever you open and close the card, which is what will trigger the sound to play. The illustrated instructions to show how to align notches with the folding line of the card is also included with the sound module. If you want, you can attach a third panel of paper to the inside of the card to cover up the sound module (this will help protect the module, so I recommend doing it).

Step 6: Test Your Audio Card
You’ve assembled and decorated your Mother’s Day card; now you need to see if it works! When you unfold the card, your message should play. When you fold it back up, the message should stop. If your recording isn’t working, make sure you’ve followed the instructions correctly and double check that the notch in the EZSound Module is aligned with fold in the card. Thankfully, my audio card worked like a charm! It was very rewarding to unfold it and hear my voice message play right away.
You wanna share this blog post in your social accounts? Please use the social icons at the bottom of this article, or the ones at the very bottom of this page. We are so grateful for your sharing
Quick links
Contact
Invite By Voice LLC
9935-D Rea Rd, Suite 230
Charlotte, NC 28277
info@invitebyvoice.com
About us
Since 2009, it has been our firm commitment to offer the highest quality sound products, and also provide excellent service for our customers.

Leave a comment: